Montana Solar panels convert direct sunlight incident over their surface into electricity. They produce varying amounts of energy depending on the intensity and direction of striking sun rays.
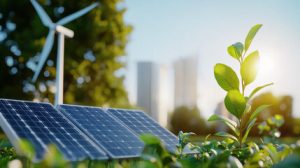
Solar panels are made of semiconductor material such as silicon, and generate current through the photovoltaic effect. Sunlight strikes the solar panel and causes a chemical reaction to produce current.
The cost of solar panel installation can be quite high, but it is possible to reduce the upfront investment through federal, state and local incentives. Incentives can save you thousands of dollars and help make a solar power system more affordable for your home. These rebates are designed to encourage the adoption of renewable energy and can make solar power a cost-effective solution for homeowners.
The type of solar panel and its efficiency can also influence its cost. Monocrystalline panels offer the best performance but are more expensive, while polycrystalline panels provide a good balance between efficiency and cost. The size of your home and its roof space will also affect the number of solar panels needed, and you should consider the average daily electricity consumption when determining the size of your system.
In addition to the solar panels, you’ll also need supporting equipment like inverters that convert DC power from your solar array into usable AC power for your home, and racking systems that secure the panels to your roof. Choosing quality components will maximize your energy output and reduce maintenance costs over time. You may also need to invest in battery storage if you want to store energy for nighttime use or during a power outage.
Solar panel installation costs typically account for 10-20% of the total system cost. This includes labor expenses, necessary permits and warranty coverage. It is best to work with a professional solar installer, as this will ensure proper system configuration and compliance with local building codes. Additionally, a professional installer will be able to provide you with a detailed breakdown of your system’s energy production and savings.
The initial upfront investment of installing solar panels can be high, but it is important to understand the benefits and savings you will reap over the long term. A quality system will reduce your home’s energy consumption, increase its value and reduce your carbon footprint. The amount of money you will save over the lifetime of your solar power system is significant, and you can minimize the up-front cost through financing options such as personal loans and energy-efficient mortgages.
Efficiency
The efficiency of solar panels is an important factor in determining the energy output of a PV system. Several factors influence this performance, including the design, installation, and environmental conditions. A high efficiency results in a greater amount of energy production per unit of space, and lowers the cost of power generation. In addition, quality manufacturing and regular maintenance can slow degradation rates and improve the longevity of the solar panel systems.
A solar panel’s efficiency is determined by the way its cells are laid out and configured along the panel. It is also influenced by the color of its protective backsheet. Backsheets typically come in a variety of colors, and some are more efficient than others. Black backsheets, for example, reduce efficiency slightly because they absorb more sunlight. Blue and green backsheets, on the other hand, reflect more light.
Solar panel efficiencies can be determined by using a formula that compares electrical output power to the input power of sunlight per square meter, standardized to 1000 W/m2. This gives a consistent basis for comparison between different solar panels and technologies. The area of a solar panel is another important parameter, as it directly influences the total output power based on the panel’s efficiency.
Many factors can negatively affect a solar panel’s efficiency, including ambient temperature and humidity. When the air is too hot, it prevents solar cells from absorbing sunlight and reduces their output. Higher humidity levels can cause dust and dirt to accumulate on the surface of the PV cell, decreasing its efficiency. Moreover, higher dew point temperatures may affect the performance of the PV system by reducing its solar intensity and causing condensation, which leads to less efficient heat dissipation.
To optimize PV panel performance, it is vital to maintain optimal operating temperatures. This can be achieved through cooling systems, heat-reflective coatings, and microinverters. These devices maximize solar panel efficiency by optimizing the conversion process for each panel individually. They also mitigate the effects of shading and panel mismatch, and are especially effective in reflective environments. Lastly, bifacial panels offer enhanced efficiency by capturing sunlight from both the front and back sides of the panel.
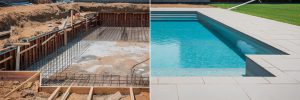
Installation
Solar panel installation is an expensive investment, but it provides long-term benefits and savings. Choosing a reputable solar provider is essential to ensure that the installation process is smooth and efficient. They should have a strong track record, competitive pricing, and positive customer reviews. Additionally, they should provide detailed quotes and offer financing options to make solar energy more affordable for homeowners.
The first step in the solar panel installation process is to assess your home’s electrical consumption and energy needs. This will help the team design a system that is proportional to your energy use. This will allow you to save the most money possible over the lifetime of your solar panels.
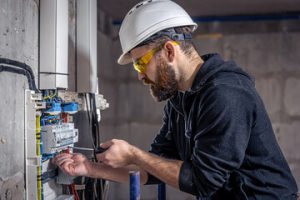
Once the installation team has assessed your home, they will mount the solar panels on your roof and connect them to an inverter. This converts the direct current (DC) from your solar panels into alternating current (AC), which is used by your home’s appliances. Once the system is connected, a final inspection will be performed by local authorities to ensure that it meets safety and building standards.
Another factor that affects the cost of solar panels is the climate in your region. Different regions have different weather conditions that require specialized equipment. These factors can also increase labour costs. In addition, solar installers are often required to purchase additional materials and equipment to meet local regulations. The cost of these extra materials can add up quickly, especially if the installers are required to install additional mounting equipment on your roof.
When comparing quotes from several installers, make sure to compare the amount of labor and warranty included in each. While cheapest doesn’t always mean best, a premium warranty can help reduce the total cost of ownership by providing peace of mind for years to come.
Moreover, homeowners who choose a reputable solar panel supplier may be eligible for rebates and tax credits to offset the initial setup cost. These incentives can make the project more financially viable and accelerate its payback period. Lastly, a quality solar panel system will last for 25-30 years, ensuring significant energy savings over the lifetime of the panel.
Maintenance
A properly maintained solar panel will produce as much electricity as possible for years to come. Regular cleaning, monitoring, and professional inspections will prevent problems that may affect performance. These include shading, soiling, and wiring issues. A professional solar technician can assess the condition of your panels and recommend any repairs or upgrades that may be necessary.
Cleaning solar panels should be done on a cool, overcast day to avoid the risk of damage. Start by brushing off loose dirt and debris with a soft-bristled brush. Then, use soapy water to gently clean the surface of your panels. Be sure to rinse off your panels afterward to prevent damage from residual soapy water. It is also a good idea to rinse your panels on a flat angle to prevent streaking.
You should also check your electricity consumption regularly. Any significant change in energy consumption can indicate a problem with your solar system. This can be caused by a number of factors, such as an unplugged wire, a new internet device, or a problem with the inverter. In many cases, the problem can be corrected by simply ensuring that all wires are plugged in and that any new devices are configured correctly.
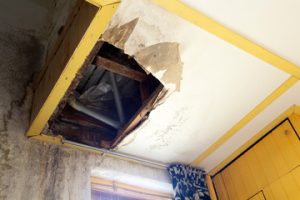
While your solar panels are designed to withstand most weather conditions, it is important to check them after major storms or high winds. These extreme weather events can affect the efficiency of your solar panels and could potentially damage them.
Regular maintenance can help extend the life of your solar panels. It is recommended that you clean your solar panels at least once a year, or more often if they are located in a dusty environment. Regular cleaning will ensure that your solar panels are soaking up the maximum amount of sunlight, and that you are getting the best possible return on your investment.
It is important to always shut off your system before performing any maintenance. Most systems have a simple, easy-to-use shut off switch, typically found near the electrical panel or inverter. To avoid tripping hazards, you should turn off the AC disconnect switch first before turning on the DC disconnect switch.